Crafts and Projects · Ramblings · Writing Appearances

Creative Way to Display Seasonal Activities

The first day of spring is only a week away! My daughters and I have brainstormed a list of activities that we would like to accomplish this spring and summer to prepare for the new season. We have been doing this for a number of years, and we have had fun creating ways to display our lists. I have discovered that having the activities visible helps us on those days when “there is nothing to do”, keeps us focused on completing the tasks that we want to finish, and serves as a fun reminder of all of the activities we have done.

I have written a post for Hands On As We Grow, which you can read here, about how we are displaying our spring and summer activities this year.

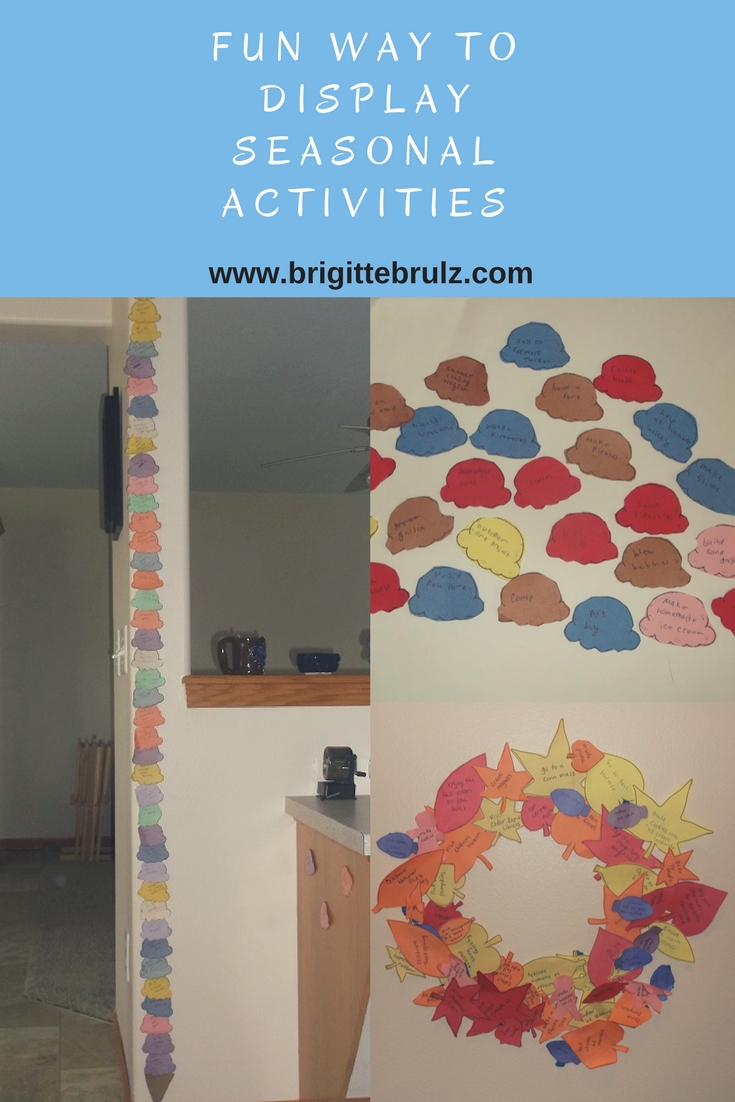
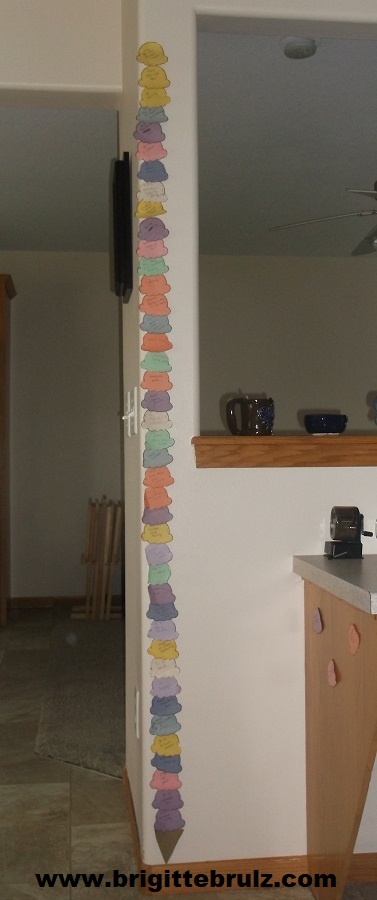
Here is our ice cream cone display of finished spring/summer activities from last year.

display your spring and summer activities

In the past, we have had “bucket lists”, which were plastic buckets with clothespins (each labeled with an activity) attached around the rims. As we completed the activities, we put the clothespins into the buckets. Another year, we wrote our spring/summer activities in bubbles I had drawn on poster board and then we “popped” (crossed off) each bubble as we completed the activity.

Now, it’s time to take down all of our fall and winter activities. This past year, we chose to write all of our fall related activities on leaves (I found a free printable on First Palette here) and all of our winter related activities on Christmas lights (I found a free printable on A to Z Teacher Stuff here), which my daughters and I printed on various colored pieces of construction paper, cut, labeled, and taped (with painter’s tape) on to a wall on our main floor. As we completed each activity, we moved them from the wall of unfinished activities to a different wall and created a wreath. I’m sure we will have fun discussing all of the activities we have completed as we take down the leaves and ornaments.

Here is our wreath of finished activities from this past fall/winter.

Display your winter and fall activities!

Do you have a fun way to display upcoming activities you would like to do?


Crafts and Projects · Writing Appearances

Easy DIY Decorative Magnets

My daughters and I love doing crafts and activities together. I especially like crafts that are inexpensive and useful (either for ourselves or as gifts to others) such as the bookmarks and coasters we have made.

Decorative magnets are another inexpensive, yet useful craft children can do at home with the assistance of an adult.

Below is a picture of a couple of button magnets my daughters made. These button magnets require only two materials (buttons and round magnets with adhesive backing – both of which I purchase at Walmart). Not only are they cute, but they are super simple to make!

DIY button magnets

The other magnets that we have enjoyed making require a few supplies and more steps, yet they are still rather easy to make. Below is a picture of the magnets my daughters and I made for my daughter’s vet themed birthday party she had a few years ago.

pet magnets for vet themed party

You can learn how to make these cute magnets on the post I wrote for Hands On As We Grow here.

What cute magnets will you make with your child?


Crafts and Projects · Jobs of a Preschooler

Use Pipe Cleaners as Stamps

I have been having fun finding crafts and activities for parents and teachers to do along with my book Jobs of a Preschooler. As I find projects, I add them to my Pinterest Board (link to my Pinterest board) entitled Jobs of a Preschooler, which I wrote about here.

Recently, I have been seeing pictures of people folding pipe cleaners into  a variety of shapes to use as stamps. My daughters decided to do a similar project and turned some piple cleaners into hearts. Perfect for a Valentine’s Day theme!

Here are their colorful heart shaped stamps made from pipe cleaners:

Use pipe cleaners to create stamps!

Using their handmade stamps, they had fun painting their own little creations. Here is one project:

DIY stamps with pipe cleaners

Here is the other:

Such a simple and fun art project to do with the kiddos. Just make sure to keep the pipe cleaners away from any kitties! My cat loves pipe cleaners for some reason, and he was eager to play with one of the painted pipe cleaners that accidentally fell on the floor. Needless to say, I had a little bit of paint to clean off his paws and the floor!

Happy painting! What are some other fun-shaped stamps you can create using pipe cleaners?

Using pipe cleaners for stamps

Crafts and Projects · Jobs of a Preschooler

Be a Builder by Building a Bridge

Be a builder by building a bridge…try to say that ten times fast!

In the book Jobs of a Preschooler, the little girl has a job as a builder on one of the pages.

Jobs of a Preschooler- I'm a builder...

Your little ones can also become builders by building a bridge.

Recently, I told my daughters to build a bridge with whatever supplies they could find in our craft supplies. The bridges had to fit across two stools that I set 8 inches a part and had to hold 150 pennies without breaking.

One daughter found a paper towel roll, which she cut open. Then, she taped craft sticks on the sides of the paper towel roll hoping they would make her bridge stronger. Once the edges of her “bridge” were taped to the stools, she began loading it with pennies. Here is the bridge with 150 pennies- it survived!

Build a bridge to hold pennies

My other daughter decided to tape numerous craft sticks together like a large raft.  It didn’t look as sturdy as the paper towel roll bridge, but it also succeeded. Here it is with 150 pennies still intact.

Build a bridge to hold pennies

This project can be done with various distances, supplies, and weights. Although both of my daughters built rather flat bridges, they could be made with various sides and supports.

For more building ideas, check out a guest post I had on Hands On As We Grow entitled 25 Ways to Build Towers Without Blocks.

Happy building!


Crafts and Projects · Ramblings

Creating Eye-Catching Pins

A few months ago, I started learning about Pinterest. It seemed like a fun platform to display quotes I like and pictures for crafts, activities, and fun information to do along with my books (currently Jobs of a Preschooler and Pickles, Pickles, I Like Pickles). After reading some books (I love books!) from the library (I really really love the library!) and watching a few videos online, I created a Pinterest account.

I have had fun learning how to create boards, make boards private or public, add pictures, follow others, and organize items. One of my New Year’s Resolutions was to continue adding items periodically to my Pinterest page. As a result, I have been trying to save five pins at least five times each week to my boards. So far, I have over 350 pins on my public board and over 150 pins on my private boards. Needless to say, I have had fun pinning on Pinterest and exploring all of the fun ideas others have pinned!

You can follow me on Pinterest (link to my Pinterest page) if you would like to stay updated on the pins I add to my boards. If you only want to see pins on certain topics, there is an option to follow specific boards.

On my Pinterest page (this links to my Pinterest page), I currently have 6 public boards:

  • Jobs of a Preschooler
  • Fun Crafts
  • Pickles, Pickles, I Like Pickles
  • Quotes for Writers
  • Quotes for Parents
  • Quotes for Homeschoolers

The Jobs of a Preschooler board is filled with all kinds of fun crafts and activities to do along with the book Jobs of a PreschoolerI currently have it divided into 13 sections:

Jobs of a Preschooler now available!

The Pickles, Pickles, I Like Pickles board is currently divided into 9 sections:

Pickles, Pickles, I Like Pickles Available

I added some of my own pictures as pins; however, they did not look as gorgeous as the majority of the pins that I have seen on Pinterest. So, I started trying to figure out how to create better eye-catching photos. I noticed a lot of people online kept mentioning a graphic design program called Canva, which has a free option. Since free fits within my budget, I decided to give it a try.

Last night (around 10PM), I created my free account in Canva. Once I figured out how to use the basic tools (free online video tutorials saved me a lot of time!), I started adding my own pictures and creating nicer eye-catching creations.

Notice, I said nicer. I am not a graphic designer, and it certainly shows in the pictures I created; however, they look a lot better than what I had before.  The two pictures shown above for Jobs of a Preschooler and Pickles, Pickles, I Like Pickles are two of the pictures I created last night using Canva.

Using Canva was addicting! I had so much fun playing around trying to create pictures to put on my Pinterest boards that I stayed up until 1 AM this morning.

I started pinning some of my pictures to my Pinterest boards, and then I realized that the pictures saved on there looked so much nicer than my website pictures. So, I plan to update some of the pictures on a few of my past posts some time in the next week.

Hopefully, future pictures will look a little nicer…no promises, though!

Do you use a program to make pictures look nicer? If so, what do you use?